


Registration
To begin with, choose Login/Register and then the tab Register.
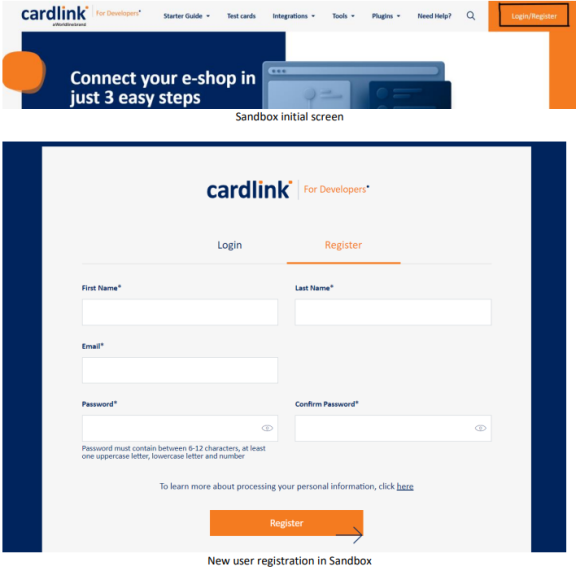
After filling in all required details and click on Register, a confirmation mail is sent and after clicking on the mail verification link, the registration is completed.
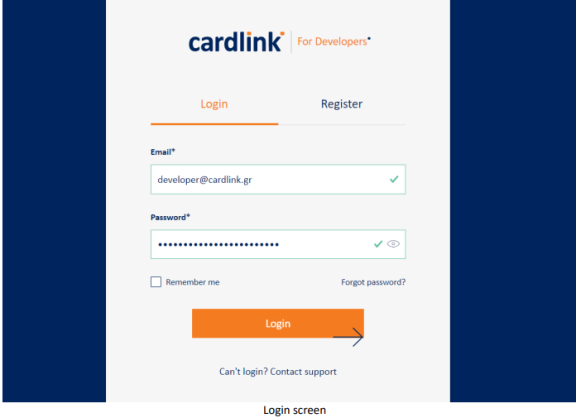
Login
Once the registration is completed, proceed with login.
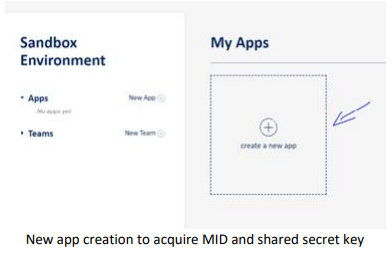
Creation of a new application
Fill in the respective fields, as shown below.
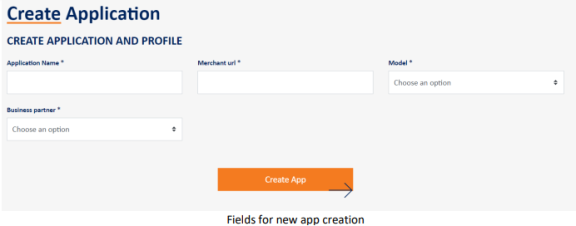
– Application Name: The new app’s name.
– Merchant URL: The URL of the site which will be integrated with the payment gateway. In case the integration is for a mobile app, a dummy URL can be used.
– Model: The integration method agreed with the Bank.
Direct, if the customer enters card data directly to merchant’s site (needs PCI certification).
Redirect, if the customer is redirected to a payment page hosted in Cardlink’s secure environment.
Redirect/Direct, if merchant needs the XML channel for secondary transactions, like refund, void, status request.
Payment link via API (XML), for creation and/or mailing of a Payment Link through XML request.
– Business partner: The Bank or the Payment Institution with which the merchant has concluded a contract.
Worldline, for cooperation with Eurobank or for online applications.
Nexi, for cooperation with Alpha Bank.
Cardlink, for cooperation with both acquirers and routing of the transactions to both of them based on specific rules.
Based on the above choices, you can then enable various features, such as installments, IRIS etc.
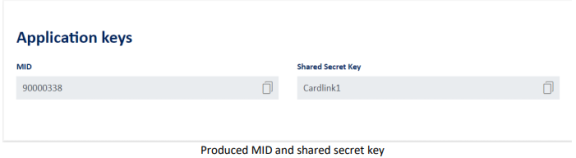
After filling in all the above and clicking on «Create App», a new Sandbox application is created. Inside that app, the MID and shared secret key that will be used in the tests for the integration are presented.
Fetch transactions and tests completion
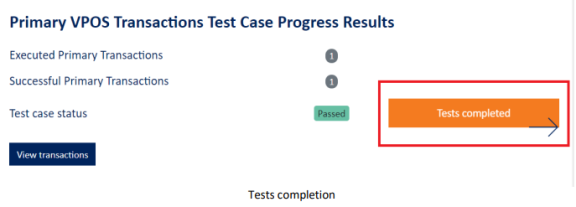
Within the created app, in «Primary VPOS Transactions Test Case Progress Results» section, transactions’ details are presented by clicking “Fetch transactions”.
![]()
Once the tests are completed and given that there is at least one successfully completed transaction, “Tests Completed” button is activated and can click on it to proceed with production boarding.
Fill in the mandatory fields in the presented form and submit it.
FAQs
Q: How many/what kind of scenarios do I need to execute?
A: You need to perform at least one successfully completed transaction to confirm that the implementation is correct and that you can properly handle the response message. Of course, you can always execute more test transactions with the available test cards if you
wish.
Q: I want to perform transactions that will not be successful, but I do not have respective test cards.
A: All available test cards can be found here. There you can find details on how you can simulate refused transactions.
Q: I cannot connect to Sandbox. I get a message that the user is not activated.
A: After registering in Sandbox, an activation e-mail is sent. Please check whether you have received that e-mail. If not, please try registering with a different e-mail address. If you still do not receive the activation e-mail, please inform us through Contact section, here.
Q: I get error message: “Merchant not found in system”.
A: Please confirm that you are using the right post URL, based on the Business Partner and the Model chosen when creating the app.
For redirect model, the respective post URLs per business partner can be found here.
For direct model, the respective post URLs per business partner can be found here for VPOS and here for MPI.
If you use one of our plug ins, make sure you have selected the right payment provider.
In case you have already been provided with an MID from the cooperation bank, that shall be used in production environment, not in test.
For your tests you will use the MID and shared secret key provided by the app you have created in Sandbox.