Api Products Menu
Digital wallets (for Worldline Greece)

Google Pay™

Introduction

Google Pay™ is a digital wallet platform and online payment system that powers in-app, tap-to-pay, and website purchases. It allows users to make payments online from the web (supported on Google Chrome, Mozilla Firefox, Apple Safari, Microsoft Edge, Opera, and UCWeb UC browsers) and with Android phones, tablets and watches using any credit or debit card saved to their Google Account, including those from Google Play, YouTube, Chrome, or an Android device.

Some of the main benefits of offering Google Pay as a payment method are:

  • A better way to pay: Google Pay™ is a faster, more secure way to pay on sites and in apps using payment methods saved to a Google Account
  • Availability: Google Pay™ is accepted in millions of places around the world. It’s available on Android, iOS, and desktop, and you can use it in multiple browsers, including Chrome, Firefox, and Safari
  • Increased conversions: Google Pay™ delivers frictionless checkout by eliminating the need to type billing and shipping details, increasing conversions by giving shoppers a better way to pay
  • Increased security: Google Pay™ protects your payment information with multiple layers of security, including card network tokenization

User Experience 

Screenshots 

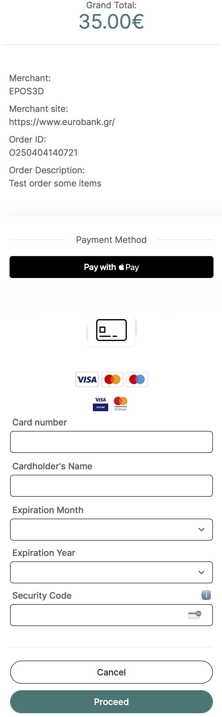
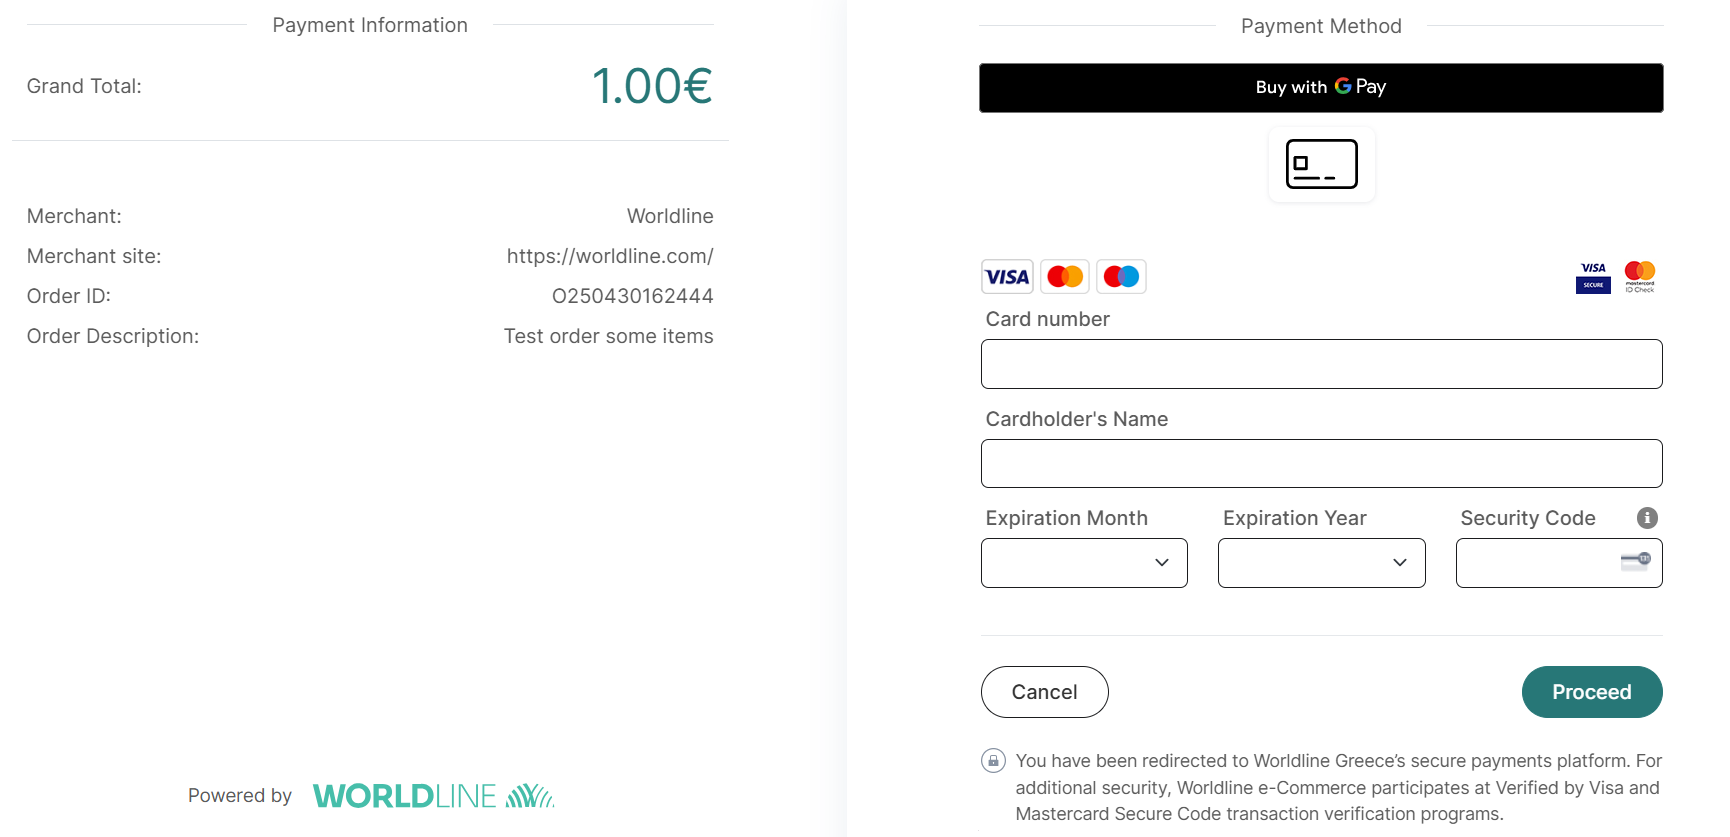
At the checkout, the customer selects the Google Pay™ button at the top of the screen:

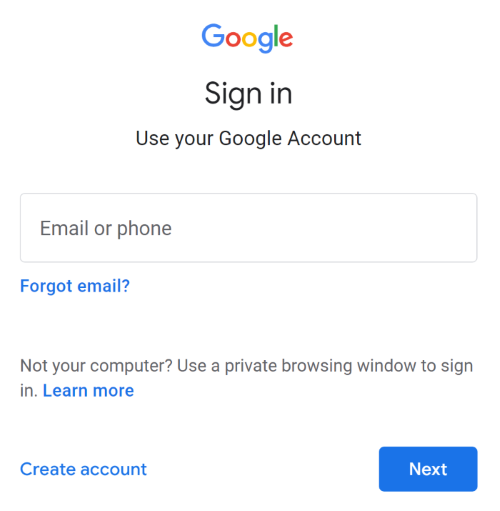
The customer then signs into their Google account:


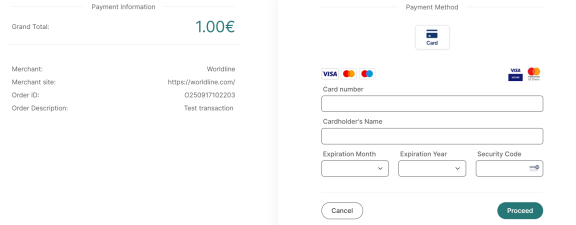
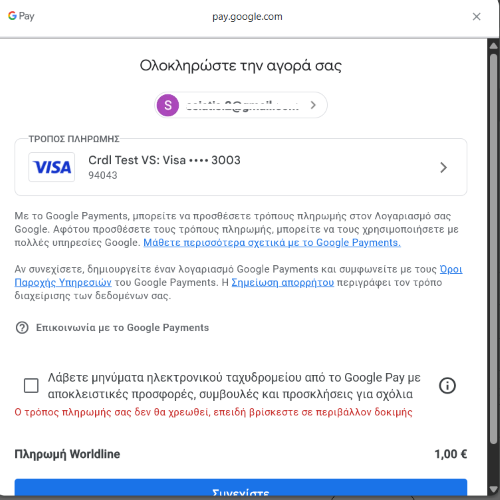
The customer selects their payment card before completing the payment:


Requirements / Restrictions

  • Transaction types supported: Payment, Pre-authorization, Refunds, Void.
  • Schemes supported: Visa, Mastercard.
  • Google Pay™ transactions are being processed only through Worldline acquirer.

Important notice: Tokenization is not supported through Google Pay™.

Google Pay for Android Webview

In case you wish to use Google Pay through Android app with Webview, you need to follow the steps described here.

You also need to clarify to Google that you wish to use Cardlink’s existing Google Pay integration through Webview and you are not trying to render a separate Google Pay button outside the payment page.

SCA and PSD2

Google Pay™ supports both CRYPTOGRAM 3DS and PAN ONLY. Cryptogram 3DS, which is a tokenized solution, will always be preferred. Most issuers will accept this as being SCA, and hence not result in the need for completion of 3D-Secure.

In case a non-tokenized solution is used (PAN ONLY) or the issuer declines the transaction for missing SCA, Cardlink’s payment gateway will automatically continue with the 3DS flow to ensure the payment can succeed. 3DS flow is by default enabled to all merchants.

All merchants must adhere to the Google Pay APIs Acceptable Use Policy and accept the terms defined in the Google Pay API Terms of Service.

Google Pay is a trademark of Google LLC.

How to activate Google Pay™

All merchants are by default activated to accept payments for Google Pay™. There is no need for any extra steps or implementation in their end. The respective button appears in the hosted payment page and is ready for use by the customer.

Testing Google Pay™

In order to test Google Pay™ functionality in the demo environment, you need to visit URL https://groups.google.com/g/googlepay-test-mode-stub-data from your browser in order to gain access to the respective test cards.

After that, those test cards will be available at the Google Pay™ account when you execute a transaction.

Apple Pay

Introduction

Apple Pay is a digital wallet service by Apple Inc. that enables secure and seamless payments across supported devices, like iPhone, iPad, and Mac. Apple Pay is integrated within the payment page to offer customers a fast and convenient payment experience.

User Experience

Apple Pay provides a seamless and intuitive payment experience for customers. When users check out:

  1. They select the Apple Pay option at the payment page. 
  2. Their device prompts them to authenticate using Face ID, Touch ID, or a device passcode. 
  3. The payment details are securely transmitted to the merchant. 
  4. Upon successful transaction processing, the user receives confirmation instantly.

The entire process is designed for speed, security, and ease of use, reducing checkout friction and increasing conversion rates. 


Requirements / Restrictions

– Transaction types supported: Payment, Pre-authorization, Refunds, Void.
– Schemes supported: Visa, Mastercard.
– Acquirers supported: Apple Pay transactions are being processed only through Worldline acquirer.

Important notice 1: Apple does not natively support iframe-based payment processing, so Apple Pay is not supported when an iframe is used to display the payment page.

Important notice 2: Tokenization is not supported through Apple Pay.

How to test

From the merchant’s/developer’s side: You need to activate Apple Pay in a newly created or already existing app in Sandbox, so as the respective Apple Pay button to appear in the payment page when the transaction is executed through a compatible device (iOS).

That test merchant number (MID) will also be automatically registered to Apple.

From the customer’s side: Use the below test account in your iOS device.

Password: #skJu*79!@
Important notice: Please DO NOT activate two factor authentication (2FA) during log in.

Test cards: If not already included in the Apple Pay wallet, you should add some of the below.

Scheme/Type PAN Exp. Date CVC
Mastercard 5204245250460049 01/30 111
5204245250522095 01/30 111
5204245251107599 01/30 111
5204245253050839 01/30 111
5204245254718095 01/30 111
Visa Credit 4051069302200121 01/27 340
4761229700150465 01/27 175
4761209980011439 01/27 466
Visa Debit 4761120010000492 01/27 480
4761349750010326 01/27 982
4761262260004228 01/27 501
4761369980320253 01/27 878
4622943120054839 01/27 100
4180620070230189 01/27 111
4123400073320224 01/27 221

You can now choose the desired test card to complete the transaction.

IRIS (for Worldline Greece)

IRIS payments

*To download the image, please right click on it and select ‘Save image as’.

IRIS Payments is a real-time payment service that allows users to initiate payments through their bank’s mobile app through QR code or online banking, in a secure, user-friendly environment.

Online shops integrate IRIS Payments to allow customers to pay directly from their bank accounts, bypassing the need for credit or debit cards.

IRIS in Redirect model

For Redirect integration method, IRIS is provided as an option within the payment page.

IRIS is available only for Payment (once off) transactions.

Refund action is not supported through e-commerce platform (API or back office) for IRIS transactions.

Please DO NOT use i-frame for IRIS transactions since there are issues with the connection to the respective e-banking. The connection through i-frame is blocked by the Banks.

Allowed characters you can use in parameter orderDesc (order description) are the below. If you use any other character that is not supported, IRIS transactions cannot proceed.

a b c d e f g h i j k l m n o p q r s t u v w x y z
A B C D E F G H I J K L M N O P Q R S T U V W X Y Z
0 1 2 3 4 5 6 7 8 9
/ – ? : ( ) . , ‘ +
Space
α ά β γ δ ε έ ζ η ή θ ι ί ϊ ΐ κ λ μ ν ξ ο ό π ρ σ ς τ υ ύ ϋ ΰ φ χ ψ ω ώ
Α Ά Β Γ Δ Ε Έ Ζ Η Ή Θ Ι Ί Ϊ Κ Λ Μ Ν Ξ Ο Ό Π Ρ Σ Τ Υ Ύ Ϋ Φ Χ Ψ Ω Ώ
= ! % * ; # _ $ \ { } [ ]

There is no need for further implementation since the IRIS option is automatically available in the payment page for the payer to choose. The only thing you should take into consideration, is that after a successful IRIS transaction, as part of the response message you will receive parameter payMethod with value ‘IRIS’, which is a new value (check also below).

The only prerequisite is to use the latest payment page which looks like below. If you are using a custom css with changes in colors/shapes/font/logos, please confirm during your tests that IRIS remains functional (check below on how to make test payments with IRIS).


If you are using a different/older payment page, you need to follow the below steps:

1. Register and/or log in Sandbox and create a new application with Business partner: Worldline or Cardlink (based on your current payment page) and Integration method: Redirect.
2. Within the new app, go to section “Payment Page" and download the respective xsl/css files of the newest default payment page.
3. Custom those files the way you desire and upload them through the same section.
4. Once the custom payment page has been adjusted to your test mid, we will inform you to proceed with your tests.
5. Confirm through your tests the proper function of IRIS and let us know to adjust the new custom payment page to your production MID as well.

If you wish, you can provide IRIS as a separate payment method in your checkout page and declare that you wish the payment to be made through IRIS by using parameter payMethod=’IRIS’. By doing that, customer directly sees the page with Bank logos and QR generation.

After a successful IRIS transaction, in the response message you will receive the respective parameter payMethod=’IRIS’.

For further information, please check here.

Important notice: If you use one of our CMS plugins here, an updated version is available to support IRIS for Worldline or Cardlink business partner.

How to test IRIS functionality

To begin with, you need to enable IRIS during a new app creation or through an existing app modification.
During new app creation, choose Worldline as Business partner and Redirect or Redirect/Direct as Model.

Post the respective request – using parameter payMethod=’IRIS’ if you wish – to open the payment page.
Choose the IRIS tab on the top right of the page to show IRIS details. If you use payMethod=’IRIS’, then you will be moved there directly.

In test environment, IRIS can be tested end to end only through QR generation. Redirection to e-banking is not supported.
Once you have generated the QR code, you do not use it through a banking mobile app, but you should expect the below results automatically after a few seconds (up to 120), based on the order amount.

Amount ending in Status
9 ERROR
8 REFUSED
anything else CAPTURED

IRIS in Direct model

For Direct integration method, IRIS can only be used via QR code.

IRIS is available only for Sales (once off) transactions.

Refund action is not supported through e-commerce platform (API or back office) for IRIS transactions.

Allowed characters you can use in parameter orderDesc (order description) are the below. If you use any other character that is not supported, IRIS transactions cannot proceed.

a b c d e f g h i j k l m n o p q r s t u v w x y z
A B C D E F G H I J K L M N O P Q R S T U V W X Y Z
0 1 2 3 4 5 6 7 8 9
/ – ? : ( ) . , ‘ +
Space
α ά β γ δ ε έ ζ η ή θ ι ί ϊ ΐ κ λ μ ν ξ ο ό π ρ σ ς τ υ ύ ϋ ΰ φ χ ψ ω ώ
Α Ά Β Γ Δ Ε Έ Ζ Η Ή Θ Ι Ί Ϊ Κ Λ Μ Ν Ξ Ο Ό Π Ρ Σ Τ Υ Ύ Ϋ Φ Χ Ψ Ω Ώ
= ! % * ; # _ $ \ { } [ ]

When IRIS is chosen as a payment method during the checkout, a Sale Request is sent from merchant’s server requesting for the QR code data.

Part of the XML response returned from the payment gateway is the Base64 encoded QR value. This value should be displayed to the buyer as an inline base64 image. Then the payer can scan it using the respective m-banking app.

You may find more details here.
PayMethod and PaymentOption should be taken into consideration regarding the request. Attributes “IRIS-QR" and “IRIS-TXID" regarding the response.

Sample request can be found here.

The transaction is initially in PROCESSING status. When the customer scans the QR within the Bank’s mobile app, the transaction returns to INPAYMENT status and that’s when we start asking DIAS for the result. The maximum validity period of the transaction is 30 minutes.
In order for your system to be informed about the result of the transaction, XML StatusRequest should be used to retrieve transaction’s status.
As long as the status is not final (CAPTURED, REFUSED, ERROR, TIMEDOUT, CANCELED, PROCESSING-TIMEDOUT), then the StatusRequest should be used again.

Relative sample request can be found here.

How to test IRIS functionality

To begin with, you need to enable IRIS QR during a new app creation or through an existing app modification.
During new app creation, choose Worldline as Business partner and Direct as Model.

Use that test mid to post the respective VPOS request as described above. Render the QR encoded data received in the response and present the QR code in your browser.

Implement a flow through which you will consume Status Request API to retrieve the transaction’s result.

The created transaction is automatically completed within a few seconds (up to 120) based on the order amount as follows:

Amount ending in Status
9 ERROR
8 REFUSED
anything else CAPTURED
IRIS (for Nexi Greece)

IRIS payments


*To download the image, please right click on it and select ‘Save image as’.

IRIS Payments is a real-time payment service that allows users to initiate payments through their bank’s mobile app through QR code or online banking, in a secure, user-friendly environment.

Online shops integrate IRIS Payments to allow customers to pay directly from their bank accounts, bypassing the need for credit or debit cards.

IRIS in Redirect model

For Redirect integration method, IRIS is provided as an option within the payment page.

IRIS is available only for Payment (once off) transactions.

Refund action is not supported through e-commerce platform (API or back office) for IRIS transactions.

Please DO NOT use i-frame for IRIS transactions since there are issues with the connection to the respective e-banking. The connection through i-frame is blocked by the Banks.

Allowed characters you can use in parameter orderDesc (order description) are the below. If you use any other character that is not supported, IRIS transactions cannot proceed.

a b c d e f g h i j k l m n o p q r s t u v w x y z
A B C D E F G H I J K L M N O P Q R S T U V W X Y Z
0 1 2 3 4 5 6 7 8 9
/ – ? : ( ) . , ‘ +
Space
α ά β γ δ ε έ ζ η ή θ ι ί ϊ ΐ κ λ μ ν ξ ο ό π ρ σ ς τ υ ύ ϋ ΰ φ χ ψ ω ώ
Α Ά Β Γ Δ Ε Έ Ζ Η Ή Θ Ι Ί Ϊ Κ Λ Μ Ν Ξ Ο Ό Π Ρ Σ Τ Υ Ύ Ϋ Φ Χ Ψ Ω Ώ
= ! % * ; # _ $ \ { } [ ]

There is no need for further implementation since the IRIS option is automatically available in the payment page for the payer to choose. The only thing you should take into consideration, is that after a successful IRIS transaction, as part of the response message you will receive parameter payMethod with value ‘IRIS’, which is a new value (check also below).

By default, the respective payment page will have the below view. If you are using a custom css with changes in colors/shapes/font/logos, please confirm during your tests that IRIS remains functional (check below on how to make test payments with IRIS).

If you are using a different/older payment page, you need to follow the below steps:

1. Register and/or log in Sandbox and create a new application with Business partner: Nexi and Integration method: Redirect.
2. Within the new app, go to section “Payment Page" and download the respective xsl/css files of the default payment page.
3. Customize those files the way you desire and upload them through the same section.
4. Once the custom payment page has been adjusted to your test mid, we will inform you to proceed with your tests.
5. Confirm through your tests the proper function of IRIS and let us know to adjust the custom payment page to your production MID as well.

If you wish, you can provide IRIS as a separate payment method in your checkout page and declare that you wish the payment to be made through IRIS by using parameter payMethod=’IRIS’. By doing that, customer directly sees the page with Bank logos and QR generation and can choose how to proceed.

After a successful IRIS transaction, in the response message you will receive the respective parameter payMethod=’IRIS’.

For further information, please check here. Make sure you can handle all possible parameters included in the response message as described here.

Important notice 1: If you use one of our CMS plugins here, an updated version is available to support IRIS for Nexi, without the need to insert IRIS customer code (seller id).

Important notice 2: If you are already using IRIS through one of our plugins with a seller id, please do not install the new version. Also, if you automatically receive updates through the respective CMS marketplace, please do not proceed with the latest update. If you install the new version, the existing IRIS integration will not be functional and you should revert back to the version you previously had.

IRIS combined with XML (direct) integration for card transactions

If you are using XML (direct) integration for card transactions, you need to use Redirect integration for IRIS transactions, which will be by default activated for that purpose. Further technical details regarding Redirect integration can be found here.

How to test IRIS functionality

To begin with, you need to enable IRIS during a new app creation or through an existing app modification.
During new app creation, choose Nexi as Business partner and Redirect or Redirect/Direct as Model.

Post the respective request – using parameter payMethod=’IRIS’ if you wish – to open the payment page.
Choose the IRIS option to show IRIS details. If you use payMethod=’IRIS’, then you will be moved there directly.

In test environment, IRIS can be tested end to end only through QR generation. Redirection to e-banking is not supported.
Once you have generated the QR code, you do not use it through a banking mobile app, but you should expect the below results automatically after a few seconds (up to 120), based on the order amount.

Amount ending in Status
9 ERROR
8 REFUSED
anything else CAPTURED


PayPal (for Worldline)

PayPal is a widely used digital payment platform that enables businesses to securely accept payments from customers worldwide. In e-commerce, PayPal serves as both a payment gateway and a wallet solution, allowing users to pay using their PayPal balance, linked bank accounts, or credit and debit cards.

Customers can complete transactions quickly without repeatedly entering their payment details, which helps reduce cart abandonment and improve conversion rates.

By leveraging PayPal, merchants can provide a trusted and familiar payment option while maintaining high standards of security and compliance.

Buyer Payment Flow

The buyer selects PayPal as the payment method on the payment page.


The system opens the PayPal checkout sheet (PayPal popup). The buyer is redirected to PayPal’s secure environment where a log in is required with buyer’s PayPal account credentials.

Once the payment is completed, the buyer is redirected back to merchant’s site.

  • PayPal is available only for Payment (once off) transactions.
  • Refund action is supported through e-commerce platform (API or back office) for PayPal transactions.

How to test PayPal

Create a new app with Business partner: Worldline and Integration Model: Redirect or Redirect/Direct or Payment link via API (XML).

Select PayPal feature to be activated.

In an existing app, enable PayPal through Configuration section.

For transaction execution, select PayPal within the payment page (as described in buyer’s flow above) and use the below credentials to complete the payment.

email: sb-wgfhy39296169@personal.example.com
password: 4ESs9VA+

Important notice: Upon successful completion of the PayPal transaction, the payMethod parameter in the response message will have the value ‘PayPalREST’.

How to activate PayPal in production environment

Once you log into back-office tool (credentials will be sent to the merchant upon production activation), navigate to merchant profile, PayPal section.

Click “Connect to PayPal” and you will be redirected to PayPal login page where you log into your PayPal account and follow each step of the process.

Once you have completed the respective steps, you need to perform the below actions to successfully enable PayPal feature in your merchant profile.

  • Click to “return to website”
  • Verify your e-mail (if required)

Merchant request optional additions

For PayPal transactions, merchant can optionally include in the payment request the below:

  • Shipping address fields: Especially when product will be shipped, merchant should include parameters shipCountry, shipZip, shipCity and shipAddress as described at https://developer.cardlink.gr/api_products_categories/redirect-integration/#Request-message-for-payment-initiation.
  • Line items based on the products/services of the respective order. Below you may find a table that describes the fields that form those line items. The formed line-item value should be included in one of the parameters var1..9. An indicative line-item value for an order of 2 products and total amount 10€ is [{“n”:”Products”,”cd”:”67″,”p”:”5″,”q”:”2″,”c”:”TA”}].

Line items can be combination of arrays of multiple var parameters, e.g., first 10 items on var2 and next 10 items on var3. Then var3 line items are appended to line items on var2.

Counter Property name Type Required/Optional Description
1. n string 1..64 R Name
2. cd string 1..32 R Product code
3. p number decimal R Unit price (in order currency), tax included
4. q number integer R Quantity of that line item
Line-item row total = p * q (tax included)
5. t number decimal O Tax  (in order currency, for that item included in price, not added to). Missing on item type tax
Order amount of the request must be equal with the total price*quantity
6. c string 2 R Product/item category
DI – digital subscriptions or services
TA – tangible/physical items shipped
DO – donations
DC – discount (amount positive)
SH – shipping
TX – tax item (total tax add as last item, if multiple tax items, then sum of tax items must be sum of taxes)
7. sku string 1..16 O Product stock unit description
In case of c=SH this is shipping descriptor
S – shipping to delivery address
P – pickup from store
I – in person shipping (buyer picks up from seller in person)
Typically, this can be manufacturer product code.
8. u string 9..255, https:// O Item URL
In case of shipping item this shall be person name to whom delivered.
9. iu string 9..255, https:// O Item image URL
10. upct string 1..5 O The Universal Product Code of the item
11. upcc string 6..17 O The Universal Product Code of the item. (code) Required if upct is provided.

Tax item is sum of each item tax * each item quantity

Order total shall be equal to sum of line-items (p*q) – discount items + shipping

Tax item shall be sum of line-items t * quantity

Recommended max 100 line-items per order, minimum at least one line-item. If physical goods shipping, line-item should be sent even if products are free.

Values for upct: UPC-A, UPC-B,UPC-C,UPC-D,UPC-E,UPC-2,UPC-5